
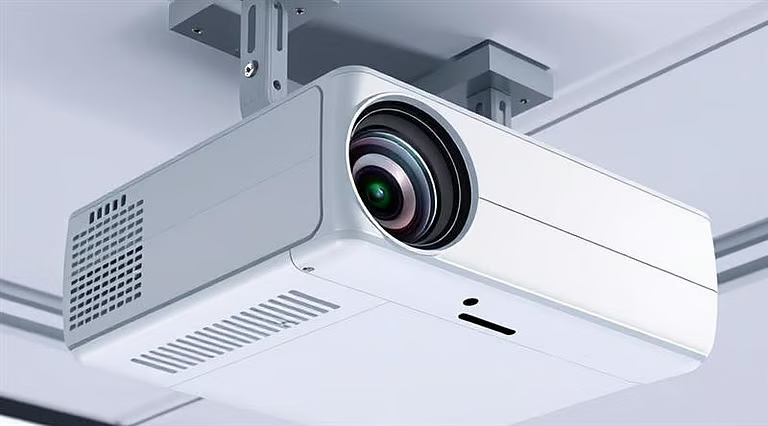
Installing a projector mounted on ceiling is one of the best ways to create a clean and professional viewing setup in your home, classroom, or office. Instead of placing the projector on a table where it can easily be moved or blocked, ceiling mounting keeps the device stable and out of the way. A projector mounted on ceiling also helps maintain consistent image alignment and reduces clutter in the room.
Many people choose ceiling installation because it improves both the appearance and performance of the projection system. When the projector stays fixed in one position, the image remains properly aligned with the screen without needing constant adjustments. A well-installed ceiling-mounted projector also allows better cable management and creates a safer environment by removing wires from the floor.
Although the process may seem technical at first, installing a ceiling-mounted projector is manageable when you follow the right steps. With proper planning and the right tools, you can set up your projector safely and enjoy a high-quality viewing experience.
Benefits of Installing a Ceiling-Mounted Projector
Mounting your projector on the ceiling offers several advantages compared to placing it on a table or shelf.
Clear and Uninterrupted Viewing
One of the biggest issues with table setups is that people often walk into the projector beam. This interrupts the image and distracts viewers. When you install a projector mounted on ceiling, the light beam stays above head level, preventing these interruptions.
More Space in the Room
Ceiling installation frees up furniture that would otherwise be used to hold the projector. This is especially helpful in smaller rooms where space is limited. A ceiling-mounted projector keeps the room organized and allows you to use tables and shelves for other purposes.
Cleaner Cable Management
Another advantage is improved cable organization. Instead of running cables across the floor, they can be routed along the ceiling or through cable covers. This makes the setup look more professional and reduces the risk of tripping hazards.
Tools and Equipment You’ll Need
Before you start mounting the projector, gather the tools and hardware needed for the installation. Preparing everything in advance will make installing your projector mounted on ceiling much easier.
The installation process requires a few standard tools, listed below:
- Projector ceiling mount
- Drill and drill bits
- Stud finder
- Measuring tape
- Screwdriver
- Ladder
- HDMI cable
- Power extension cable (if required)
- Cable clips or raceways
Safety gear, such as gloves and protective glasses, is also recommended when working with tools and drilling into the ceiling.
Having these items ready will make the installation process smoother and safer.
Simple Steps to Install a Ceiling-Mounted Projector
1. Choose the Correct Location
The first step is determining where the projector should be installed. The distance between the projector and the screen plays an important role in determining the size and clarity of the projected image.
Most projectors have a recommended throw distance indicating how far the projector should be from the screen. Checking the projector manual or using an online throw calculator can help you find the correct position.
When planning the placement, ensure the projector lens is aligned with the center of the screen. This helps ensure that the ceiling-mounted projector produces a properly aligned image without extensive digital adjustments.
2. Locate the Ceiling Joists
For safety reasons, the mount must be attached to solid ceiling joists rather than drywall alone. Drywall cannot support the weight of a projector and mounting bracket.
Using a stud finder will help you locate the wooden beams behind the ceiling surface. Once you identify them, mark the positions clearly.
If the joists do not line up exactly with the screen center, you can attach a mounting board across two joists. This provides a strong base for installing your ceiling-mounted projector while maintaining proper screen alignment.
3. Install the Ceiling Mount Bracket
After identifying the correct mounting points, hold the ceiling bracket against the surface and mark the screw locations.
Drill pilot holes into the joists to make it easier to insert the screws. Then, secure the mounting bracket tightly using strong screws designed for ceiling installations.
Before tightening everything completely, check that the mount is perfectly level. Even a small tilt can affect the alignment of your ceiling-mounted projector and cause image distortion on the screen.
4. Attach the Projector to the Mount
Once the ceiling bracket is installed, the next step is to attach the projector.
Most mounting kits include adjustable arms that connect to the projector’s mounting holes located on the bottom of the device. Secure the projector using the provided screws and ensure everything is tightened properly.
After attaching the projector, adjust the tilt and rotation so the lens points directly toward the screen. When installed correctly, the ceiling-mounted projector should remain stable and balanced.
5. Connect Cables and Manage Wires
With the projector mounted securely, connect the HDMI cable and power cable.
Proper cable management is important for maintaining a clean setup. Instead of leaving cables hanging loosely, use cable raceways or clips to guide the wires along the ceiling or walls.
This approach not only improves the room’s appearance but also protects the cables from damage. A well-organized setup complements the clean look created by a ceiling-mounted projector.
6. Adjust and Calibrate the Projection
After completing the installation, turn on the projector and test the image.
Adjust the focus and zoom until the picture appears sharp and fits the screen correctly. Many projectors also include keystone correction and lens shift features that help fine-tune the alignment.
While these features can correct minor issues, it is always better to physically position the ceiling-mounted projector as accurately as possible during installation.
Testing the projector with videos or presentations will help ensure that the image quality meets your expectations.
Safety Tips and Common Mistakes to Avoid
When installing a ceiling-mounted projector, safety should always be a priority.
Always secure the mount to ceiling joists rather than relying solely on drywall. Double-check measurements before drilling holes to avoid alignment problems later.
Another helpful precaution is installing a safety cable. Even though a properly installed projector mounted on ceiling is usually very secure, a backup cable provides additional protection.
Taking your time during installation and carefully following each step will help ensure a stable and long-lasting setup.
Conclusion
Installing a projector mounted on ceiling is a practical solution for improving both the appearance and performance of your projection system. By keeping the projector securely positioned above the viewing area, you can prevent interruptions, save space, and maintain consistent image alignment.
With proper planning, the right tools, and careful installation, creating a ceiling-mounted projector setup is easier than many people expect. Once everything is properly aligned and calibrated, your projector mounted on ceiling will provide a reliable and high-quality viewing experience for movies, presentations, and entertainment for years to come.


Leave a Reply